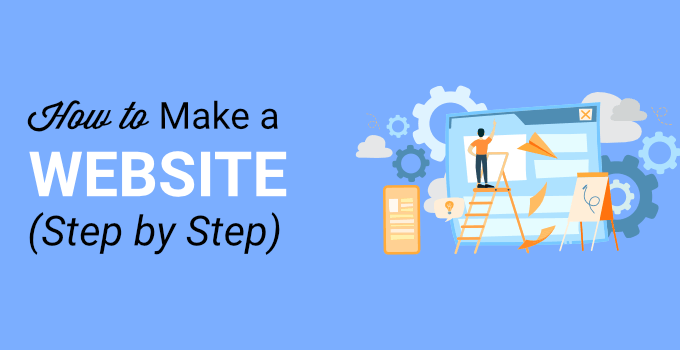

Weebly Website Builder Guide For Beginners
How To Create a Free Website Using Weebly Website Builder In Less Than 60 Minutes
Until lately, it would cost a few thousand dollars for a professional to construct your website. However, with today’s simple-to-use DIY free website builders such as Weebly you can finally have an excellent small business site up in under one hour.
CLICK HERE TO VISIT WEEBLY OFFICIAL WEBSITE
Weebly stays one of the leading free website builders out there. Weebly is a good alternative for small business owners that want to construct a site quickly, easily, and at a reasonable price.
Continue reading to find out how to make your free website using the Weebly site builder in 7 easy steps.
Step one is to visit Weebly.com To create your free website

When you click on sign up, you will be taken to a sign-up screen that looks like the one below.

Click on the “Sign up” button and you’ll be taken to a page that asks you if you would like to sell online or not.

Do not be worried if you are not selling online yet but are amenable to doing this in the long run. It’s possible to add an internet store to your site at any moment. Therefore, if you’re going to use your own Weebly free website solely for blogging or anything else, then you can pick “Not Now”.
Step Two: Select a Theme
The next step is to figure out what kind of template or theme you would like to use for your free website. Weebly provides a vast choice of new, modern themes that could work for a number of purposes. A particular theme will likely make more sense for the company than others.
A number of important things to remember when choosing a Template/Theme:
You can change the theme anytime — In contrast to its competitor Wix, the Weebly Site Builder offers the flexibility to change themes whenever you desire. When you switch to a new theme, all the content you have created is seamlessly transferred to the new design, ensuring that no essential information is lost. Consequently, the initial theme you select for your free website becomes inconsequential, as you have the freedom to switch to a more preferable theme at any time.
Weebly has industry-specific themes — While it’s true that any template can be customized to suit various markets, most templates are initially designed with a specific type of business in mind. If you prefer a more streamlined customization process, you can opt for a theme that is already tailored to your industry. In doing so, you will find that only minor adjustments are required, such as changing images, page names, and text, saving you a significant amount of time and effort.
Always ask, “What am I trying to accomplish?” — Different websites excel at achieving specific goals compared to others. For instance, if your main objective is to generate leads through an action button, a theme like the one featured below would be ideal for your needs.

Instead of having a variety of places to click, it just provides one option, “Plan Your Adventure,” and makes that the central focus.
If you’re searching for more of an informational Website, then you likely need a template such as the one below.

This theme features clear tabs at the top, allowing your customers to easily navigate to different pages of your Weebly site and explore more about your small business. As you scroll down the site, you will find multiple hyperlinks to additional pages, providing visitors with the opportunity to browse around and learn more about what you have to offer.
To get a preview of any template you’re interested in, simply click on the theme picture, enabling you to explore its design and functionality before making a decision.
Once you have made up your mind on the theme you want to use, simply click “Start Editing” at the top right-hand corner of the Theme Preview page.

Step Three: Pick Your Domain Choice
The next thing you will notice is your domain option page. It looks like the image below:

If you’d like a free Weebly site, your sole option would be to use the subdomain of weebly.com. But your domain will not be as exceptional, however, you won’t need to pay anything.
If You’d Like Your Own Unique Domain Name, You’ve Got 3 Choices:
Get one through Weebly — It’s free for your first year with A paid package and then about $20/year subsequently.
Purchase one via a third party and link it to your account — I highly recommend you go with Namecheap for the domain name registration. You can register a domain name for as low as $5.68/year if you follow this link Namecheap.com
Make use of an existing domain name — Should you already possess a unique Domain name, it is possible to link it to a Weebly site. It’s somewhat complex, but a lot of domain providers can do this for you if you make that request.
Please note; that if you make up your mind to use your own custom domain name, You’ll need to obtain a Weebly site premium package. All paid packages permit you to make use of your own special domain name.
Step Four: Construct Your Weebly Site
As Soon as You have chosen your domain name, then You’ll Be taken to The Weebly site builder page, which is where you will actually do all of the significant construction of your site.

This is a breakdown of the Weebly website builder:
Element Bar — Located on the left-hand side of the builder, as highlighted by the red box above, is the Element Bar. This section contains all the necessary components, referred to as “Elements,” that you can utilize to construct your website. Adding an element to a page is a simple process. Just click and hold on the desired element, then drag and drop it to the desired location on the right-hand side of the webpage.
Site Tabs — Just like most website builders, the Weebly site builder has a navigation tab (yellow box) along the top of the page. The tabs are, “Build,” “Pages,” “Theme,” “Store,” “Apps,” and “Settings.” To alter the bigger parts of your website, just click on the corresponding navigation tab to edit the settings.
Site Preview — This unveils the genuine components of your website. The site preview area, enclosed within the blue box, displays the actual representation of how your website will appear in reality.
Adding & Editing Pages
If you want to add, delete, or edit any of your page settings, simply click on the “Pages” tab at the top of your Weebly website builder screen. You will then be taken to the page’s screen.
When you first begin, you will likely only have a few active pages. In this theme, you will start out with a “Home,” “About,” “Services,” and “Contact” page, as shown below.

To incorporate a new page, simply click on the white “+” symbol located near the top left corner of the webpage (highlighted by the red box in the image below). If you wish to modify or delete an existing page, click on the small folder icon next to the page name (highlighted by the blue box in the image below).

You can change the page sequence by simply dragging each page name above or under the other names.
There Are Numerous important items to take note of here:
Your webpage is the default homepage — Upon closer observation, you’ll notice a small home icon (highlighted with a yellow underline in the image above) positioned alongside the “Home” page folder icon at the top. This indicates that the designated “Homepage” is the page that visitors will initially encounter when accessing your Weebly Site (in most cases).
You May drag-and-drop a Webpage to the right-hand side to Make a Subpage —
If you wish to create a webpage that does not appear on your main pages tab, you can achieve this by creating a subpage. Follow these steps:
1. Create the subpage just like you would create a regular page.
2. Rearrange the subpage so that it is positioned below the main page you want it to be connected to.
3. Drag the subpage to the right-hand side.
4. By following these steps, you will successfully create a subpage, as demonstrated below.

In this case, the “About” page is now a subpage of the “Home” page.
The navigation pages displayed on your tabs will consist of the most important pages that visitors will see. Referring to the provided screenshot, we can observe that the “Home” and “Contact” pages serve as the main pages, while the “About” page functions as a subpage.
This setup ensures that only the prominent pages appear on the navigation bar. When a customer hovers their mouse over a main page, the related subpages will appear in a drop-down tab. As depicted in the image below, you can observe that the main navigation bar shows only the “Home” and “Contact” pages. However, when hovering over the main page (as captured in the screenshot), the “About” page is revealed in the drop-down tab.

It’s worth mentioning that you have the ability to modify the settings of each page by clicking on the aforementioned small folder icon.
Upon doing so, you will be presented with a page that allows you to make various changes. Here, you can choose whether to hide the page in navigation, adjust the overall page design (such as landing, splash, title, etc.), and also make edits to advanced settings like the page description and meta keywords.
Altering or Editing Text Using the Weebly Free Website Builder
Modifying or editing text within the Weebly free website builder is a straightforward process. Simply click on the text box or element that you wish to edit. If you are starting fresh and haven’t entered any text yet, clicking on the text box will make it go blank, and a text settings bar will appear (as shown below). On the other hand, if you are editing existing text, you will need to delete it first before adding new content.
As depicted in the image below, you can see that I began typing “Thi” before capturing the screenshot.
To edit the text in a button, It’s a bit more complicated. You must click on the button, and then you’ll see a pop-up window. You will then click on the “Button text” tab.

Then a window will appear where you can just type in your text. When you’ve entered your text, then you just click out of the window and the button must display the changes you have made. Displayed below is the result after I edited the text.

Changing or Adding an Image
To start with, assume you want to select a background image that’s already in your theme and only change it to something specific to your industry. It is simple!
Simply click on the image and then you’ll be provided with the options to either “Edit Background” or “Replace Header Layout”.

Upon clicking the “Edit Background” button, you will be directed to a page where you can choose to either “Replace” or “Edit” the existing image. If you wish to change the current picture, you will be directed to the Picture Editor window. Here, you have the option to upload an image from your computer or select from the available pictures within Weebly’s library.
In the case where you are selecting a picture that is part of a template’s page background, as shown in the current situation, a popup window will appear with the image below. To proceed, click on the “Upload Picture” button.

Then you will see this page, which will either Make It Possible for you To select a picture from the computer hard disk to include or you might also drag and drop a photograph here from your own desktop computer.

In a lot of cases, you will just click on the “Upload a Photo from the personal computer” button to locate your picture on your personal computer and then double click on it. Following that, you will be presented with a preview of how the photo will appear on the webpage. To finalize the changes, click on the “Save” button located in the top right corner. Additionally, you will be prompted to choose whether you want to save the photo only for this specific page or apply it to all pages within your Weebly site, especially when it pertains to a header or background image.

If you want to add a picture to a webpage that doesn’t have one yet, the process is simple. Just drag and drop the “Picture” section from the components tab of the Weebly site builder onto the desired webpage, as illustrated below.

As Soon as You have done this, you simply click on the upload image box which appears.

After clicking, you will get the same window showing several slides earlier, with the green button that says “Upload a photo from your computer.”
In this scenario, all you need to do is click on the button mentioned, which will prompt you to locate the file on your computer. Simply double-click the desired image, and it will be automatically updated on your Weebly site. There’s no need to press “save” or perform any additional steps.
Step Five: Explore Extra Components & Options
The Weebly site builder Provides you with lots of different Component choices.
For example, you can…
- Change your theme/template at any time
- Add maps to any page
- Establish a contact form
- Insert knobs or dividers
- Insert a Number of media, such as Videos and Audio files
- Insert a questionnaire
Plus Much More
Most of these actions are quite straightforward once you become familiar with the web builder. However, if you encounter any difficulties or need further guidance, Weebly provides excellent tutorials for each of these activities in their Support Center. These tutorials closely resemble the information provided in this article, providing detailed instructions accompanied by screenshots to illustrate each step. The tutorials will assist you in understanding and executing the tasks effectively.
Step Six: Publish Your Weebly Website
Once you have completed all your initial edits, it’s time to publish your Weebly free website and make it accessible for people to visit. Remember that you can make further adjustments at any time by accessing the Weebly free website builder, so there’s no need to strive for perfection before going live.
To publish your Weebly free website, simply click on the orange “PUBLISH” button located at the top right-hand side of the editor.
If you are using the free version, it will bring up the domain name selection window again, just as it did earlier in the process.
The final step is to enter a code to verify that you are a human, and then click on the orange “Ok, Publish my website!” button.
Step Seven: Decide What Sort of Plan You Need To Move Ahead
The free package offered by Weebly is designed to meet the basic needs of a free website. However, if you desire a professional website, we do not recommend the free option. With the free package, you won’t have the ability to use a customized domain name, and Weebly advertisements will be displayed on your web pages. Furthermore, if you wish to have more advanced functionality or an online shop, upgrading to a premium package is necessary.
Here’s a breakdown of Weebly’s package and what attributes are included with every one of them.
Needless to say, the Weebly free website builder is included with each plan.
Free – Unlimited pages, hosting, Weebly Subdomain, Weebly advertisement, 500MB storage limit, blog, email, and chat support service.
Starter ($8/month) – Free domain (1 year), hosting, no Weebly ads, unlimited storage limit, sell up to 10 products (3% transaction fee), email and chat support.
Pro ($12/month) – Everything in Starter Plan + phone support, HD Audio and Video Players, in-depth site reporting, sell up to 25 e-Commerce products (3% transaction fee), site search, have up to 100 members.
Business ($25/month) – Everything in Pro Plan + unlimited membership, SSL security, unlimited e-commerce products, 0% transaction fee on all sales, integrated shopping cart on your domain, digital goods, inventory management, shipping, and tax calculator, coupon codes.
Overview
For small business owners in search of a free website solution, the Weebly site builder is a fantastic choice. It offers a wide range of reliable features, is cost-effective, user-friendly, and especially suitable for beginners. By following the step-by-step guide provided in this tutorial, you can create a professional-looking Weebly site within 60 minutes or less, all without spending a single penny. With Weebly, you can kickstart your online presence and establish a polished website that suits your business needs.
Furthermore, should you decide to upgrade your plan to the premium option at any point, Weebly allows for seamless transition, making it an excellent choice to scale your business. Whether you need additional features, advanced functionality, or enhanced customization options, upgrading to a premium plan with Weebly ensures that your website can grow alongside your company’s needs. With Weebly’s flexibility, you have the freedom to start with a free plan and easily transition to a premium plan as your business expands.


good
Thank you for the lesson!
Love it
I wanted to create my own website
For poetry and stories I can wrote stories please coperate
Please l want to create a website. I need help 🙏 Thank you.
THANK YOU SO MUCH
I WANT TO CREATE MY OWN WEBSITE
Thanks just for my music band
I want to create my website for artwork selling and creative Art tools selling
I want to create my website for Bible studies
Thanks i want to create a website for historical stories
I need a website
I want to create a website for my business